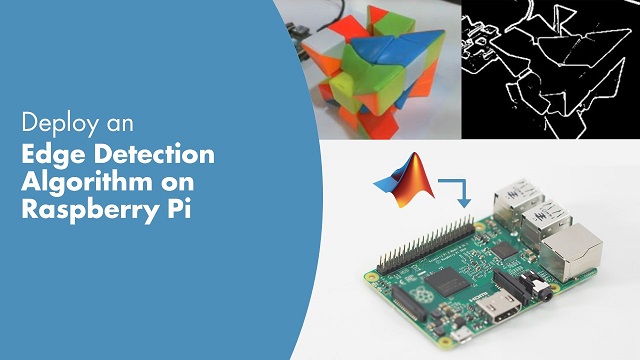
What is going on, everybody. My name is Meeshawn, and welcome to this video on how to deploy MATLAB algorithms to Raspberry Pi. For a while, we have been deploying algorithms from Simulink to Raspberry Pi. In this video, I will show you how to deploy your MATLAB code to the Raspberry Pi hardware. I will help you get started with a simple LED blink example. I will show you how to write MATLAB code to deploy it on Raspberry Pi. Later, I will show a more complex edge detection example.
让我们快速看一下您需要的东西 - 由Micro USB电缆和以太网电缆供电的Raspberry Pi板,一个USB网络摄像头,它是V4L2支持的网络摄像头,当然还有Matlab。万博1manbetx您可以使用MATLAB版本支持的任何Raspberry Pi板。万博1manbetx但是,此示例要求您将MATLAB发布2018及更高。对于此视频演示,我使用了Raspberry Pi 3型B板。网络摄像头将用于视频结束时讨论的边缘检测示例。您还需要MATLAB编码器产品以及MATLAB进行代码生成。
好吧,现在我们已经知道了先决条件,让我们开始在Matlab开始。为了与MATLAB的Raspberry Pi合作,您首先需要为Raspberry Pi安装MATLAB支持包。万博1manbetx支持软件万博1manbetx包使您可以从运行MATLAB的计算机远程与Raspberry Pi硬件进行通信。它包括一个MATLAB命令行界面,用于访问硬件的外围设备和通信接口。要了解有关支持包的更多信息,请在此命令的帮助下万博1manbetx参考此文档。
Let's begin by creating a raspi object to connect to the hardware from MATLAB. If this is the first time that you are connecting with the Raspberry Pi hardware, then you might be prompted to enter the IP address, username, and password, as well. Using this interface, you can collect data from sensors connected to the Raspberry Pi hardware through SBI and I2C buses, process them in MATLAB and actual devices attached to a Raspberry Pi hardware.
For example, you can set the on-board green LED on or off using the method writeLED. In short, the Support Package lets you interactively control the Raspberry Pi hardware from MATLAB. The Raspberry object also provides methods to execute Linux commands on the Raspberry Pi hardware.
好的,现在让我们使用此命令创建一个脚本来眨眼LED。除此之外,让我们在Raspberry Pi硬件上也执行一些文件操作。为此,让我们创建一个空文本文件。W在这里表示写许可。
Next, let's write a for loop to blink the LED for, let's say, seven times. Let's implement a period of one second using the pause function. The pause function is Codegen compatible for Linux boards. At the end of the cycle, we will write the count of the blink operations to the file we just created. End of the loop. Now, after writing the data, let's close the file and save the script. Let's call it blinkNWrite since we are doing both LED blink and file write operations.
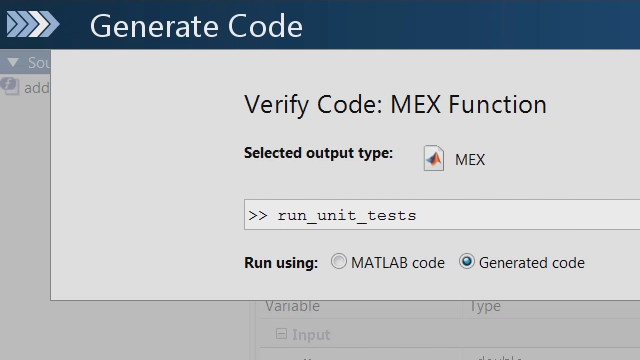
All right, so now let's take a look at a typical work flow to deploy algorithms to Raspberry Pi hardware. The first step in the workflow is to create a MATLAB function. We just created a MATLAB script a moment ago. And now we will be adding the keyword function at the top, followed by the name of the function.
In order to deploy an algorithm to the Raspberry Pi hardware, it is required that we implement the script as a MATLAB function. Currently, as of MATLAB 2019b, you can deploy MATLAB functions without any input/output arguments. All right, so our next step in the workflow is to execute this MATLAB function. Clicking on red button or pressing F5 will run the function in MATLAB and control the LED on-board Raspberry Pi based on the logic implemented in the function.
Right, so now we can see a file, sample.txt, has been created in the current directory. And as you can see here, the LED has started to blink. And it just completed doing so 7 times. Now, let's open this file. Blinking on-board LED for count is equal to one up to seven. Perfect. So our MATLAB function just toggled the LED and created a file in the current working directory of MATLAB. Let's delete this file for now.
So this is the connected I/O workflow, wherein MATLAB interacts and controls the peripherals of the Raspberry Pi hardware, which in this case is the on-board LED of the Raspberry Pi hardware. Next, we look at deploying this MATLAB function to the hardware. In this workflow, MATLAB coder will convert the MATLAB function into an equivalent C C++ code, followed by a build, load, and execute on the hardware. This executable will run independent of MATLAB, otherwise known as standalone execution.
我们首先在功能签名之后在Pragma%#codgen上添加指令,以表明我们打算在硬件上部署MATLAB函数。添加此指令指示MATLAB代码分析仪,以帮助您诊断和修复违规行为,从而导致部署期间可能出现错误。该分析仪在编辑器窗口的右上方提供了一个指标。绿色发光表明未检测到任何问题。
正如您在这里看到的那样,绿色显示在我们功能的顶部。因此,我们可以继续下一步。请注意,并非所有功能调用都支持代码生成。万博1manbetx因此,我们的下一个目标是检查代码生成支持。万博1manbetx
To fix the unsupported function call errors, you can either declare the function as coder.extrinsic, or replace the function with an equivalent function call that is supported for code generation. For more information on coder.extrinsic, search in the documentation by typing doc coder.extrinsic.
For a list of supported function calls, search in the documentation by typing doc language support code generation. For a list of Raspberry Pi peripheral functions submitted for deployment, search the documentation for doc functions supported for deployment. Luckily in our case, we do not have any unsupported function calls.
Next, we'll talk about two important functions which will help us deploy the MATLAB function as a standalone on the hardware, which is our final objective. We begin by creating a hardware configuration object using the function target hardware. For example, to create a configuration object for the Raspberry Pi hardware enter target object equals target hardware Raspberry Pi.
创建的对象有助于一个人配置各种部署选项,例如硬件设备地址,用户名和密码。默认用户名和密码分别是Pi和Raspberry。其他选项包括在硬件上设置“构建目录”位置,构建部署的操作首选项,例如构建,加载和运行,或者仅构建,以及RunonBoot选项,并在打开硬件后自动执行该功能。所有这些都可以在将MATLAB函数部署到硬件之前进行配置。
Now we are ready to deploy our MATLAB function to the Raspberry Pi hardware. And we will do so with the help of the function deploy. This function deploys the MATLAB function as a standalone executable on the hardware. It also generates a deployment report which contains the information about the deployment status.
如果部署期间产生的任何错误,您可以使用报告调试该功能并验证该功能适合部署。此外,我们还必须注意,要部署的MATLAB函数不得像MATLAB 2019b发布一样具有任何输入或输出参数。部署,目标对象,blinknwrite。
这个函数需要两个arguments, namely the hardware configuration object and the name of the MATLAB function to be deployed, which is blinkNWrite in our case. Executing this command will deploy the MATLAB function on the Raspberry Pi hardware. Code generation is successful, and the code generation report is generated. As you can see here, the LED is blinking.
The file sample.txt will be returned in a Linux directory, as specified in the Build Directory of the target hardware configuration object. Note that the file sample.txt is now generated on Raspberry Pi, unlike the connected I/O workflow, where it got generated in the MATLAB Working Directory. We can now copy the file from the hardware into MATLAB by executing these commands-- r is equal to raspi, getfiler, Build Directory location.
As you can see here, the file pops up in the Working Directory. Let's open this file. Blinking on-board LED for count equal to one up to seven.
All righty. So far, we have developed a MATLAB function, executed it initially in MATLAB using the connected I/O workflow, and then successfully deployed it to the Raspberry Pi hardware. The code generated out of the MATLAB function ran on the hardware and manipulated the LED independent of MATLAB.
现在,让我们回顾一下,了解到目前为止讨论的两个工作流程,连接I/O和部署。连接的I/O可让您与MATLAB的硬件及其外围设备进行交互。您可以从传感器中收集数据,以MATLAB进行处理,并相应地控制执行器。而在部署中,代码是从MATLAB函数生成的,在硬件上加载和执行以进行独立执行。
连接的I/O工作流更适合调试,花费更少的时间来编译,因此对于快速原型制作很有用。但是,由于其束缚的操作方式,始终需要进行物理连接。这是为了促进在连接的I/O工作流程中MATLAB和Raspberry Pi之间共享的按需请求响应。因此,每个计算步骤都有一个周转时间。
On the other hand, deployment matches production workflows where the code has to run independent of MATLAB and the host computer used to design the project. The execution is in real time, as the deployed code doesn't have to wait for MATLAB for every step of calculation. But it does involve compilation and deploy, which is not very ideal for debugging and rapid prototyping.
好的,这是迄今为止讨论的两个工作流程的摘要。在下一个视频中,我们将查看一个更专用的应用程序,即Edge预测算法。有关更多有趣的视频,请访问www.tianjin-qmedu.com/videos。谢谢你。