Segment Image by Drawing Regions Using Image Segmenter
This example shows how to segment an image in theImage Segmenterapp by drawing regions of interest.Image Segmenter提供了许多不同的ROI形状包括多边形s, rectangles, ellipses, and circles. In addition, you can draw freehand shapes or assisted freehand shapes that help you by following the underlying shape of the objects in the image.
Image Segmenter提供了许多不同的分割方法和using the app can be an iterative process. You might try several different methods until you achieve the results you want.
Load an Image in Image Segmenter
Open theImage Segmenterapp and load an image to be segmented. The app can open any file that can be read byimread.
For this example, read an image into the workspace. This example uses an MRI image of a knee. The goal is to create a mask image that segments the bone from the soft tissue in the image.
I = dicomread("knee1"); knee = mat2gray(I);
Open theImage Segmenterapp from the MATLAB® toolstrip. On theAppstab, in theImage Processing and Computer Visionsection, clickImage Segmenter![]() .
.
On the app toolstrip, clickLoad, and then selectLoad image from Workspace. In the Import from Workspace dialog box, select the image you read into the workspace.Image Segmenterdisplays the image you selected.

You can also open the image in theImage Segmenterapp using theimageSegmentercommand, as follows:
imageSegmenter(knee);
After you load an image into the app, you can optionally load an existing binary mask. For example, you might have previously created a mask of an RGB image in theColor Thresholderapp and you want to refine the segmentation. To load an existing mask, clickLoad Mask. The segmentation mask image must be a logical image of the same size as the image you are segmenting.
Use ROI Tools to Draw Regions for Segmentation
Expand the Add to Mask group and clickDraw ROIs. The app opens the ROI tab.

Select the type of ROI you want to draw. For this example, chooseAssisted Freehand. As you move the cursor over the image, it changes to the crosshairs shape. Press the mouse button, and begin drawing a freehand shape over the area of the image that you want to segment. With the Assisted Freehand ROI option, which is preselected, you can draw a freehand shape that automatically follows edges in the underlying image to help you draw a more accurate ROI. As you draw, click the mouse to create waypoints. Waypoints can help you make fine adjustments to the shape after you finish drawing. To add additional waypoints after you finish drawing, double-click on the ROI edge.
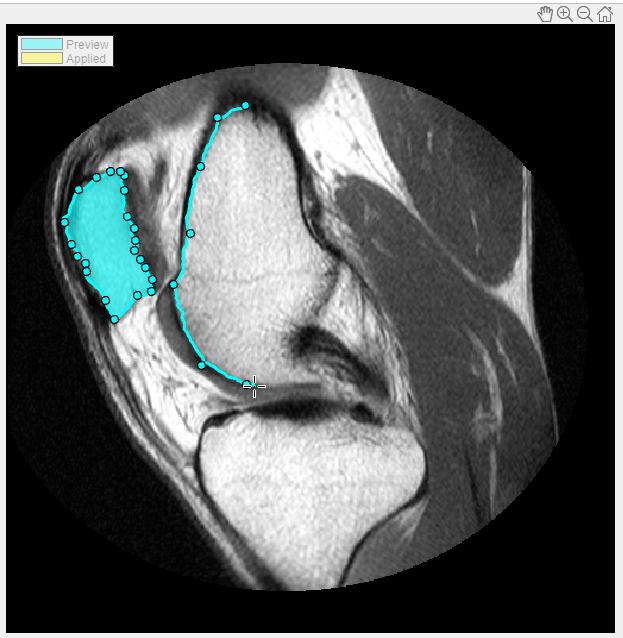
Continue drawing shapes until all the areas you want to segment are identified. To save the regions your have drawn, clickApply(their color changes to yellow). To return to the Segmentation tab, clickClose ROI.

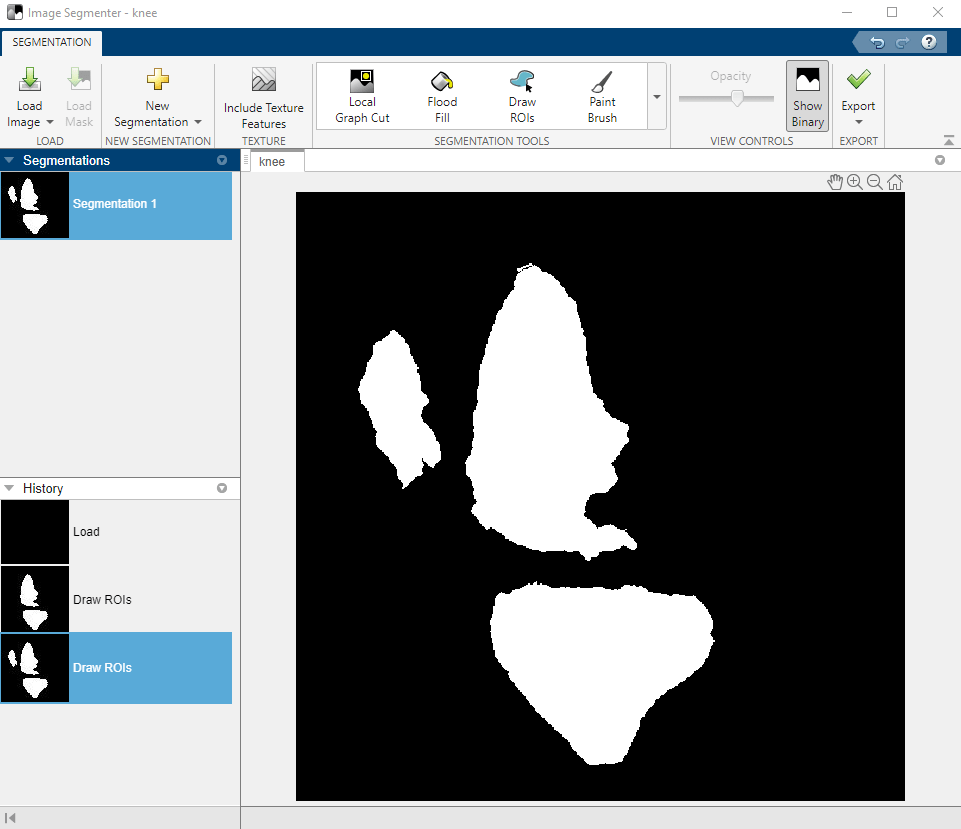
To view the mask image, clickShow Binaryon the Segmentation tab. To refine the mask image, use the tools in the Refine Mask section ofImage Segmenterapp toolstrip, such asClear BordersorFill Holes. When you are done, clickExportto save the mask image to the workspace.
See Also
Related Topics
You can also select a web site from the following list:
Americas
- América Latina(Español)
- Canada(English)
- United States(English)
Europe
- Belgium(English)
- Denmark(English)
- Deutschland(Deutsch)
- España(Español)
- Finland(English)
- France(Français)
- Ireland(English)
- Italia(Italiano)
- Luxembourg(English)
- Netherlands(English)
- Norway(English)
- Österreich(Deutsch)
- Portugal(English)
- Sweden(English)
- Switzerland
- United Kingdom(English)